Pressure Washing Before Painting: The Prep Step That Decides How Long the Paint Lasts
You have picked the color, booked the painter and maybe even bought sample pots. The part that gets the least attention is the one that decides whether that new paint looks sharp for years or starts peeling by next summer: getting the walls clean first.
Pressure washing before painting removes the dirt, mildew, pollen and chalky residue that stop fresh paint from bonding to the surface. Paint sticks to whatever it touches. If that is a layer of grime instead of the wall, the grime is what lets go. In Central Florida, where humidity keeps mildew growing on almost every exterior, washing first is the difference between paint that grips and paint that blisters.
Almost Every Florida Exterior Needs a Wash Before Paint
Painters rely on a clean, dry, sound surface, and a home exterior in Florida rarely starts out that way. Even walls that look fine from the driveway usually carry:
- Mildew and algae, which keep growing under new paint and show through as dark spots
- Chalk, a powdery residue left as old paint breaks down in the sun
- Pollen, dust and spider webs packed into stucco texture and siding laps
- Sprinkler residue and rust along the lower few feet of the walls
Wipe your hand across a sunny wall. If it comes away white or colored, that chalk will weaken the bond of anything painted over it.
Soft Washing Is the Safer Prep for Most House Walls
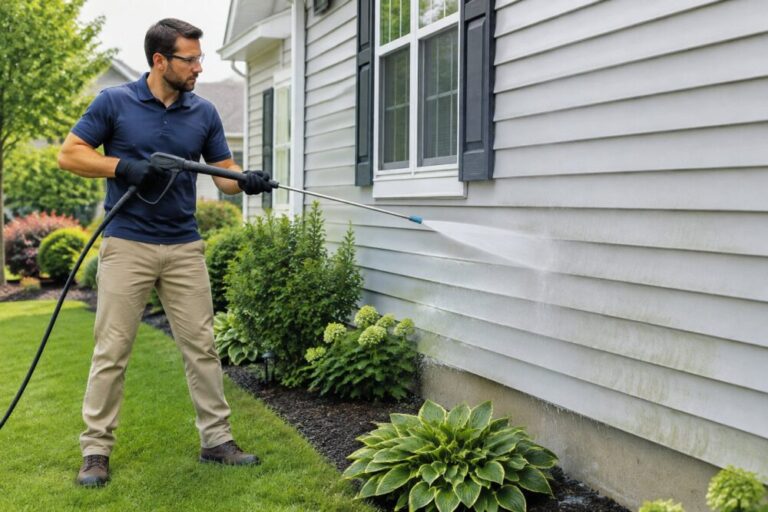
The phrase “pressure washing” gets used for all exterior cleaning, but the safest way to prep most house walls is a soft wash. That means applying a cleaning solution at low pressure, letting it work on the growth and grime, then rinsing gently.
Stucco is porous and textured. High pressure can etch it, chip edges and drive water into hairline cracks right before you seal them in with paint. A soft wash cleans the texture without that risk. Our guide to soft washing stucco explains why.
Vinyl, fiber cement and wood siding can have water forced behind the laps by a strong spray. Wood can also be furred or gouged. Low pressure and the right cleaner protect them.
Concrete block and brick can handle a little more, but mortar joints and painted block still do better with a gentle approach.
Driveways, walkways and pool decks are different. They are dense and flat, and they can take higher pressure at the right setting if you are cleaning them at the same time.
Loose Paint Is a Separate Job
A wash will knock off some flaking paint, and that is normal. What it should not be used for is stripping. On a home built before 1978, loose paint also needs extra care, which is covered further down. Blasting at peeling paint with high pressure gouges the surface, soaks the wall and still leaves edges that need scraping.
Plan on washing first, letting the wall dry, and then letting the painter scrape, sand and prime the problem areas. Your painter will also caulk gaps around windows, trim and penetrations, and caulk sticks far better to a clean surface.
If Your Home Was Built Before 1978
According to the EPA, nearly 30 percent of homes in the United States, mostly those built before 1978, have lead-based paint. If your home is that age and the existing paint is peeling, washing can send paint chips into the soil around the house.
The EPA says pressure washing is not a prohibited practice under its lead renovation rules, but when it is part of a renovation it is subject to containment requirements, including keeping dust and debris, waste water included, inside the work area. If you are not sure your paint is lead-free, have it tested or ask your painter before anyone starts washing, and make sure whoever does the renovation work is EPA lead-safe certified.
How Long to Wait Between Washing and Painting
Paint needs a dry surface. Moisture trapped under fresh paint is one of the most common causes of bubbling and peeling.
How long that takes depends on the material and the weather:
- Vinyl dries fastest, often within a day of sun, because it does not absorb water.
- Fiber cement takes on some moisture at cut edges and unpainted spots, so give it a little longer.
- Wood absorbs water and usually needs longer still.
- Stucco and block hold moisture deep in the material. They can feel dry on the surface well before they are dry inside.
A Central Florida summer adds a twist. Afternoon storms can re-wet a wall you washed that morning. Leaving a buffer of a few dry days between the wash and the first coat, and letting the painter check the walls with a moisture meter before starting, takes the guesswork out. Your paint’s label will list surface and weather conditions, and your painter can confirm the walls are ready.
Protect the House While It Is Being Washed
A pre-paint wash puts a lot of water on the walls, so a little setup keeps it out of the wrong places. Close every window and door, and check that window weep holes and dryer vents are not sprayed directly. Cover exterior outlets and light fixtures, or have them taped off. Move patio furniture, grills and potted plants away from the walls, and wet down shrubs before any cleaner goes on so they absorb less of it. Pets and kids should stay inside until the rinse is done.
A Simple Order of Work
- Walk the house and note peeling areas, cracks and wood damage.
- Repair what needs repairing, such as rotted trim or large stucco cracks.
- Wash the house, using a soft wash on siding and stucco.
- Let everything dry fully.
- Scrape, sand and prime loose or bare areas.
- Caulk gaps and joints.
- Paint.
Washing comes before scraping because it is easier to see what paint is truly failing once the dirt and mildew are gone.
Why Hire a Professional for the Pre-Paint Wash
A house wash before painting is about more than looking clean. The goal is to kill the mildew rather than just rinse it, get the chalk off without damaging the surface, and keep water out of places it should not go. Doing that across two stories, under eaves and around windows takes the right equipment and a careful hand.
Essentials Pressure Washing has cleaned homes across Central Florida since 2005. Our house washing service uses soft washing with biodegradable cleaners rather than the high pressure that damages siding and stucco. If you are getting the whole exterior refreshed, we can also clean the driveway so it does not look tired next to the fresh walls. Landlords prepping a property between tenants can use our rental property pressure washing, and for a broader look at the process, see our guide to exterior house washing.
Give your painter a clean start. Call (407) 284-9438 to talk through your timing and get a free estimate, with no obligation.
Frequently Asked Questions
How Long After Pressure Washing Can You Paint?
It depends on the surface and the weather. Vinyl siding can be ready within a day of sun, while stucco, block, fiber cement and wood often need longer because they take on moisture. The wall must be fully dry, so have your painter check before starting.
Can Pressure Washing Damage a House Before Painting?
It can if the pressure is too high. Strong spray can etch stucco, gouge wood and force water behind siding. A low-pressure soft wash cleans the surface without those risks.
Does Washing Remove Mildew or Just Hide It?
A proper soft wash uses a cleaning solution that kills mildew rather than just rinsing the surface. That matters before painting, because mildew left under new paint keeps growing and shows through as dark spots.
Will Pressure Washing Remove Old Peeling Paint?
It will knock off some loose flakes, but it is not a substitute for scraping. Using high pressure to strip paint damages the wall and soaks it. Wash first, let it dry, then scrape and prime.
Should I Pressure Wash Before Painting My House?
Yes. Fresh paint bonds to whatever is on the wall, so dirt, chalk and mildew left behind become the weak layer that peels. Booking the wash a few days ahead of the painter gives the walls time to dry fully before the first coat goes on.